How to Install and Configure Multiverse-Core
- HolyHosting

- Oct 27, 2025
- 2 min read
Hello HolyHosting community! 🌟
Today we bring you a step-by-step guide to install and configure the Multiverse-Core plugin on your Minecraft server.
This plugin is a great way to add multiple worlds to your server, allowing you to create different dimensions like the Nether or The End. We’ll make it fun and simple, so let’s get started!

🚀 Installing Multiverse-Core
Navigate to the Multiverse-Core download page.
Click the “Download Latest File” button to download the plugin.📥

Access your server’s control panel.

Go to the “Files” section and locate the “Plugins” folder.

Select the “Upload” option and choose the “Multiverse-Core” plugin.

Start the server to load the plugin.
Done! The plugin should now be installed on your server. Now, let’s see how to use it!

🛠️ Getting Started with Multiverse-Core
Once the plugin is installed, let’s explore the basic features of Multiverse-Core.
🌍 Generating a New World
To create a new world, use the /mv create command. Here’s how to do it:
Basic command: /mv create [World Name] normal

With this command /mv create [world name] normal, you’ll create a new Overworld.

To create Nether or End worlds: replace “normal” with “nether” or “end”.

➕ Some Commands… ➕
/mv tp [player name] [world name] —> This command will teleport the selected player to the world you choose.

/mv list —> This command will show you a list of all the worlds on your server.

/mv remove [world name] —> Deletes the world you select (a common issue is that the plugin may ask you to delete the world directly from the control panel).

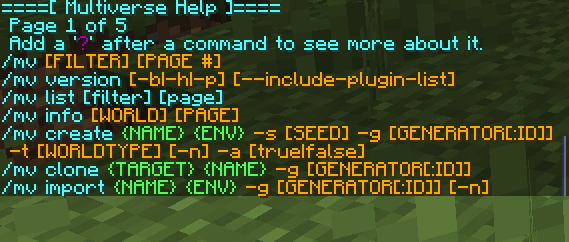
/mv help —> This command opens the help menu. Explore the many commands you can use! 🌌

Conclusion
We hope this guide has been helpful! 🚀 Remember, don’t hesitate to ask questions on the HolyHosting Discord or contact our support team.
Follow us on Twitter @HolyHosting to stay up to date.

Stuffy @ HolyHosting


